Learn to code in Scratch – the basics
Learn to Code in Scratch
This is the first lesson in the series – Learn to Code in Scratch – and we’ll be taking you through, step-by-step, a simple project to get you started and help you understand the Scratch coding window.
The coding window
First of all, lets go to the Scratch website and take a look at the coding window.
Here’s what it should look like;
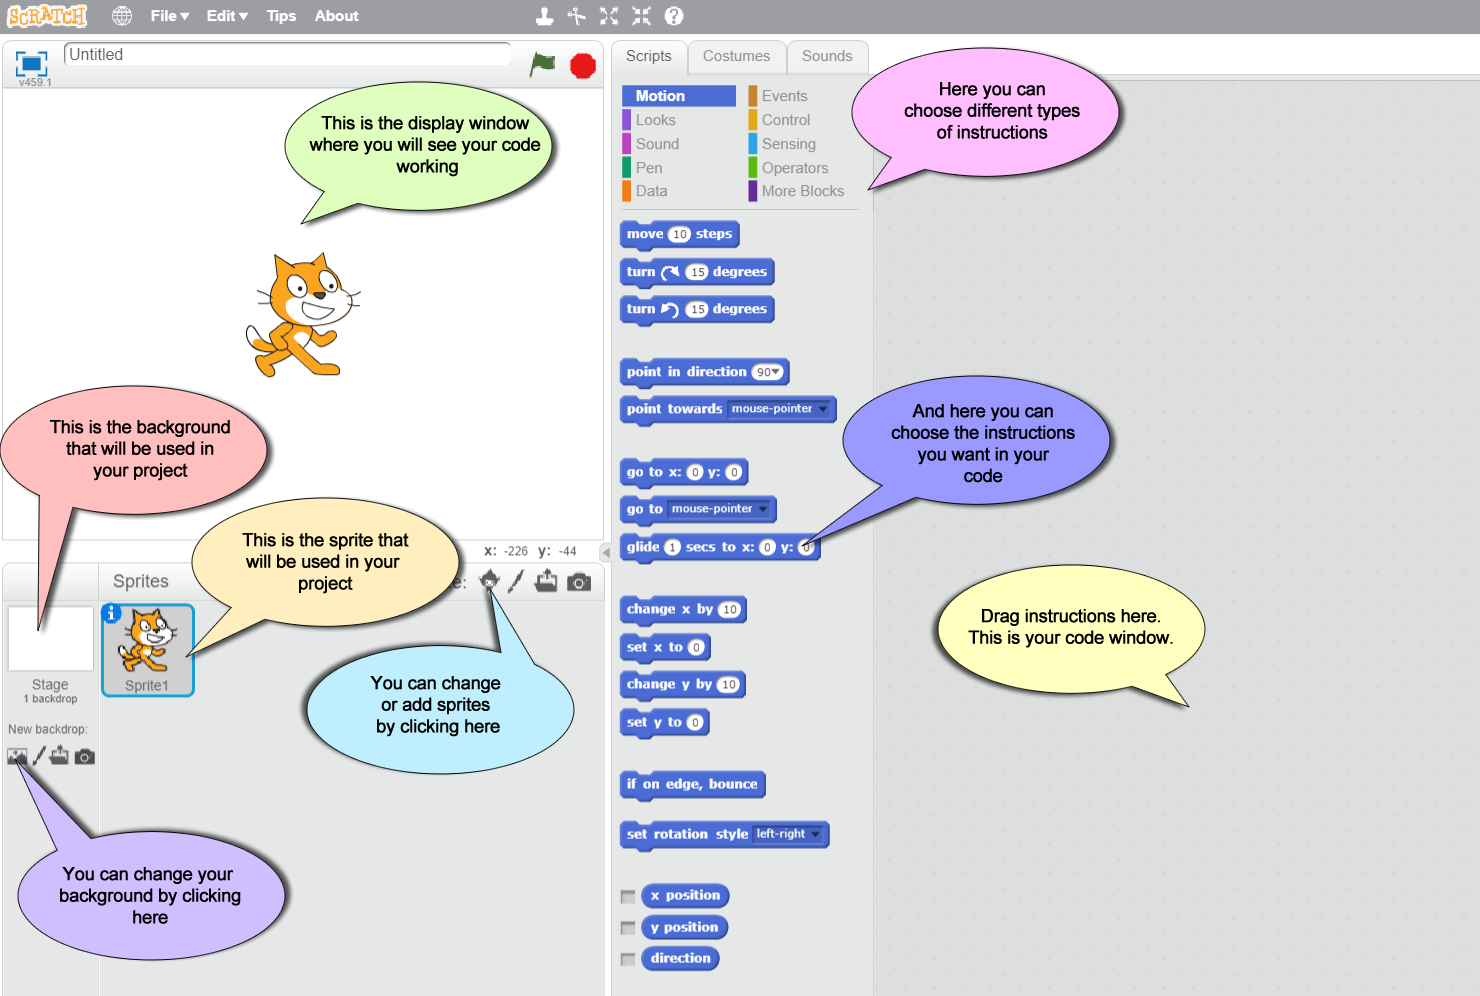
When you first learn to code in Scratch, you need to become familiar with the coding window as you will be using all of the features marked above.
Choose a backdrop
![]()
When you first use Scratch, you’ll see that Scratch the Cat ![]() is the sprite being shown in the display window and the backdrop of display window is blank.
is the sprite being shown in the display window and the backdrop of display window is blank.
The first thing we will do is give Scratch-the-Cat a nice background to move in.
Click on the backdrop button (see below) and choose a background for your sprite.
 .
.
For my example project, I’m going to choose the Winter backdrop, so my display window looks like the picture of Scratch in the snow.
Our first script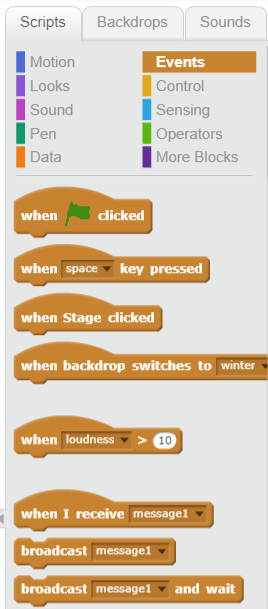
Next we’re going to code our first simple script.
Scratch utilises drag-and-drop coding blocks. The tabbed sections hold the various coding blocks. Therefore, the instructions you want to use in your script are chosen from the options in the tabbed sections near the top of the page.
First of all, lets click on the Scratch-the-Cat (the sprite) in the display window. This tells Scratch that we are coding some instructions for the sprite.
Next, we’re going to give instructions for the sprite to move forwards 20 steps.
To do this, choose the SCRIPTS tab, then click on the MOTION option that appears under SCRIPTS. Next, hover your mouse over this code block ![]() then hold down your left mouse button and drag the code block into your coding window, then let go of the mouse button.
then hold down your left mouse button and drag the code block into your coding window, then let go of the mouse button.
This action – holding down your left mouse, pulling the code block across, then letting go of the mouse button – is called drag-and-drop. You will need to use this drag-and-drop action a lot in Scratch. Once you’ve done this, click where it says ’10’ and changed it to ’20’. This will result in 20 steps being taken by your sprite, rather than 10.
Then we’re going to have our sprite say hello. Click on the LOOKS option in the SCRIPTS tab. Drag-and-drop this code block ![]() into your code window. Place it just underneath the blue move code block that is already in your code window – you’ll see that they attach themselves together like a jigsaw puzzle.
into your code window. Place it just underneath the blue move code block that is already in your code window – you’ll see that they attach themselves together like a jigsaw puzzle.
Last, we are going to add an instruction which tells Scratch when to start up our program. Click on the EVENTS option in the SCRIPTS tab. Drag-and-drop this code block ![]() into your code window and attach it to the top of your move code block.
into your code window and attach it to the top of your move code block.
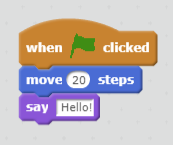
Your script should look something like this.
Test your code
To make your program start, you need to click on the green flag at the top of your display window.
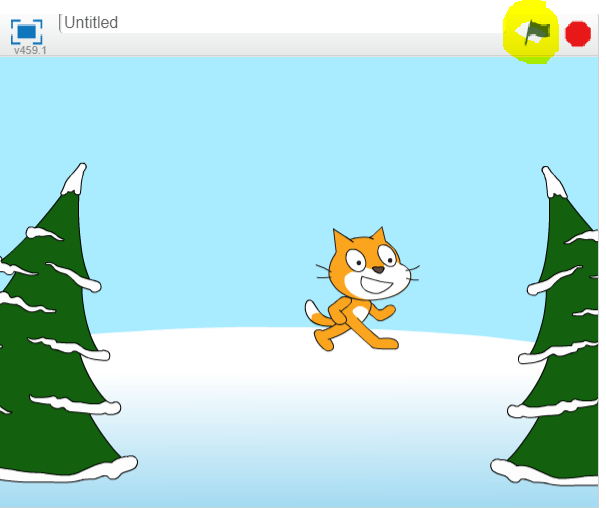
And your project should look something like this. See what happens when I click the green flag with my mouse? Scratch-the-Cat moves forward 20 steps and then says “Hello”.